—
Getting Your Guitar Singing Again: A Casual Guide to Changing Strings
So, you’ve noticed your guitar sounding a bit… dull? Maybe those once-bright notes are now more like muddy whispers. Or perhaps you’ve snapped a string mid-jam session, leaving you with a sad, incomplete Chord. Whatever the reason, it’s time to change your guitar strings. Don’t worry, it’s not as scary as it sounds! Think of it like giving your axe a fresh set of vocal cords.
Why Bother Changing Strings?
First off, let’s talk about why this is even necessary. Strings, like everything else, wear out. They lose their elasticity, accumulate grime, and simply don’t vibrate as well as they used to. This translates to a loss of tone and intonation, meaning your guitar won’t sound its best, and it might even go out of tune more easily. Plus, old strings can be rough on your fingers, making playing less comfortable.
Gathering Your Supplies

Before you dive in, you’ll need a few things:
A new set of strings: Choose a gauge (thickness) and type that suits your playing style and guitar. If you’re unsure, ask your local music shop for advice.
Let’s Get Started!
Now, let’s get down to the nitty-gritty. We’ll break it down step-by-step:
Step 1: Removing the Old Strings
Start by loosening the old strings. You can do this by turning the tuning pegs counterclockwise. If you have a string winder, use it to speed up the process. Once the strings are loose, you can remove them from the tuning pegs and the bridge. Be careful not to scratch your guitar’s finish.
Step 2: Cleaning Time!
With the old strings off, take this opportunity to clean your fretboard and bridge. A soft cloth and some guitar polish will do the trick. This is a great time to also check for any loose screws or other issues.
Step 3: Installing the New Strings
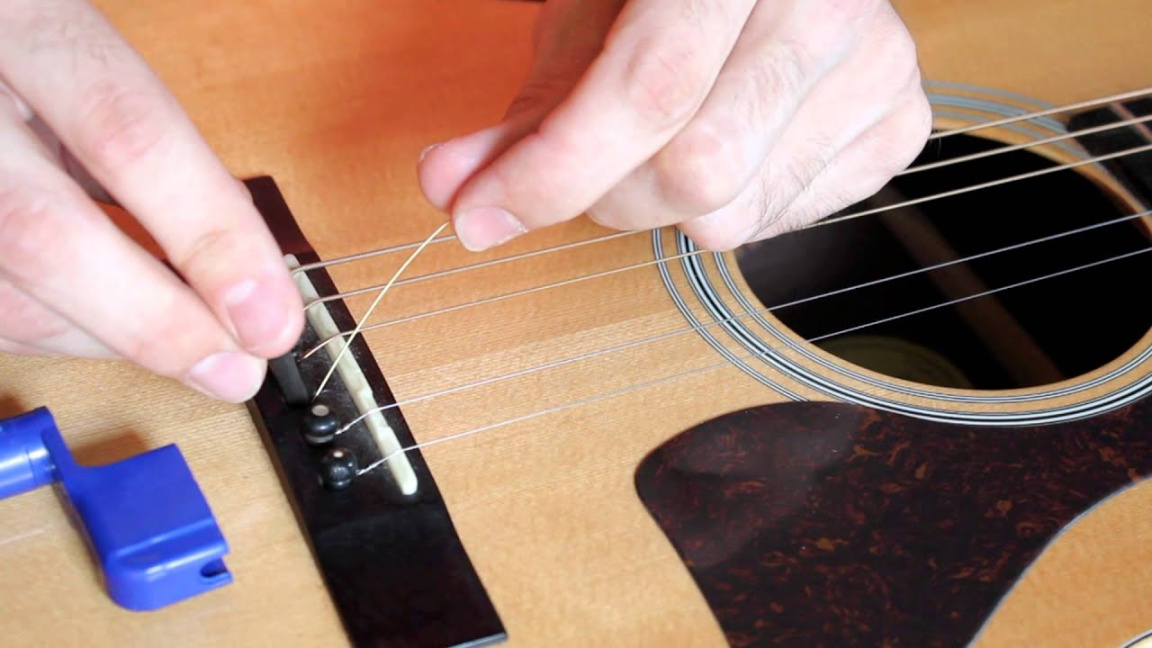
Now for the main event! Start with the lowest string (the thickest one). Insert the ball end of the string into the bridge. Make sure it’s securely seated. Then, thread the other end of the string through the corresponding tuning peg.
Step 4: Winding the Strings
Here’s where the string winder comes in handy. Start winding the string around the tuning peg, making sure the string winds downwards towards the headstock. Leave a bit of slack before you start winding, about two to three inches. This will help prevent the string from slipping. Aim for about three to four winds around the peg. Repeat this process for each string.
Step 5: Tuning and Stretching
Once all the strings are on, tune your guitar. You’ll notice that the strings will go out of tune quickly at first. This is normal. You need to stretch them. To do this, gently pull on each string a few times, then retune. Repeat this process until the strings hold their tune.
Step 6: Trimming the Excess
Finally, use your wire cutters to trim the excess string at the tuning pegs. Leave about half an inch of string sticking out.
Tips and Tricks for a Smooth Change
Change your strings one at a time. This helps maintain the neck’s tension and prevents it from warping.
What About Different Guitar Types?
The basic process is the same for acoustic and electric guitars, but there might be slight variations. For example, some acoustic guitars have bridge pins that hold the strings in place. Electric guitars often have a tremolo system, which can add a bit of complexity to the process. If you’re unsure, consult your guitar’s manual or ask a professional.
Conclusion
Changing your guitar strings might seem daunting at first, but with a little practice, it’ll become second nature. It’s a fundamental skill that every guitarist should have. Not only will it improve your guitar’s sound and playability, but it’ll also give you a deeper connection to your instrument. So, grab a new set of strings, follow these steps, and get ready to hear your guitar sing like never before. Remember, it’s all about keeping your instrument in top shape, and fresh strings are a huge part of that. Happy playing!

